- Feb 13
Paint Prep: Least Favorite, Most Important
- Michael Mankarious
I took a paint-and-body class when I was young and impatient. I was excited to learn how to paint a car, and I would use my car as the project. I allotted about 20% of the total project time towards prep and the rest to painting and finishing. In reality, it was the other way around. If you didn't prep sufficiently, the paint wouldn't adhere correctly, and your entire paint job would be for nothing.
As I've gotten older, I've learned a variety of other skills from working on my car to working on the house, and the lesson that continues to repeat itself is that it's all in the prep: bad prep, bad results.
It's no different with detailing, particularly when applying a protective coating on your car's paint, whether that's wax, sealant, or ceramic coating.
Prep is going to help you achieve the look and longevity offered by the protective coating you invested in. It's hard to accept this truth when you can be as impatient as I am.
The Prep Rule
Can I do a quick wash, lay down the coating/wax/sealant, and call it a day?
If we're honest, that's how most of us feel, but the results start with a quality prep job. It's so important that 80% of protection performance relies more on the prep than the product you choose.
You can tell when someone reverses this rule. The results are in the prep.
What Paint Prep Actually Is (and Isn't)
Properly prepping a car isn't just about washing it – sure, that's part of it, but not all of it. What we need is to ensure the protective coating has sufficient adhesion to the paint. If you've ever painted a wall or a car, you'll know that sometimes you need primer. Primer gives the paint coat a chance to adhere properly. It's the same concept when applying a protective layer, whether it's wax, sealant, or ceramic coating.
It's important to remove contamination, oxidation, oils, and any old product residue from waxes, sealants, or even a prior coating to achieve the best adhesion and, therefore, the best results.
The Decontamination Steps
Let's break it down by each step:
Washing seems basic, but it is an important step because it removes all the contaminants that are not embedded in the paint. Use a quality car wash shampoo to remove any contaminants, bug splatter, and general road grime.
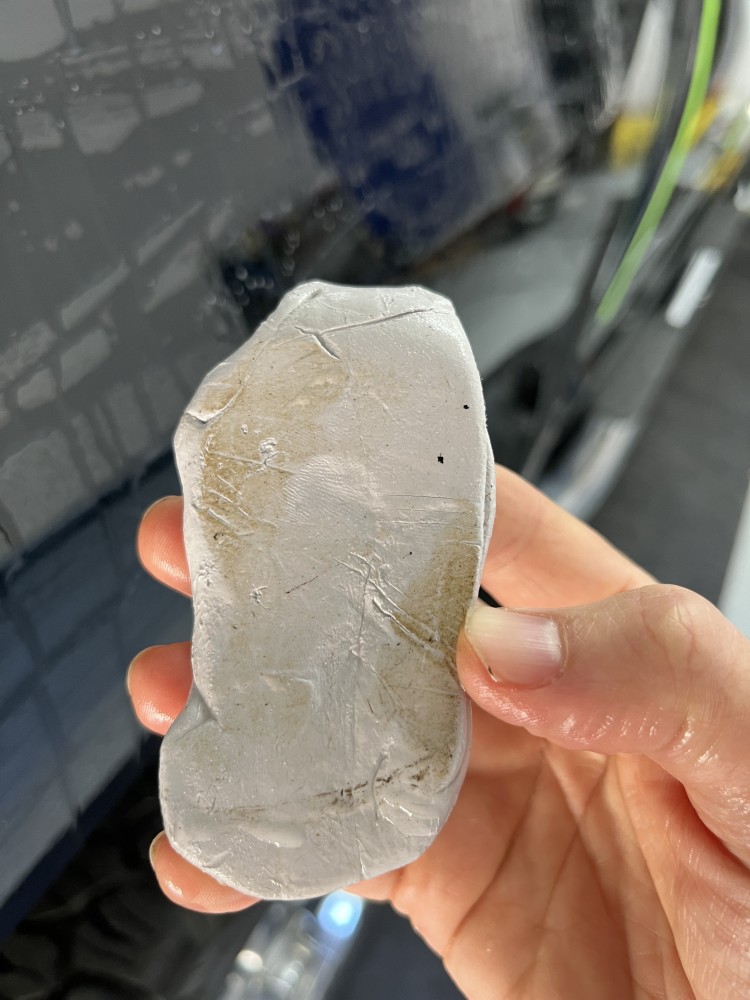
Then we go into decontamination mode. In particular, the removal of iron particulates. Using a clay bar removes bonded contamination, including metal particles from brake dust, rail dust, and general road pollution. It removes the unseen iron contamination that can over time damage the paint and make your paint feel rough even if appears clean.
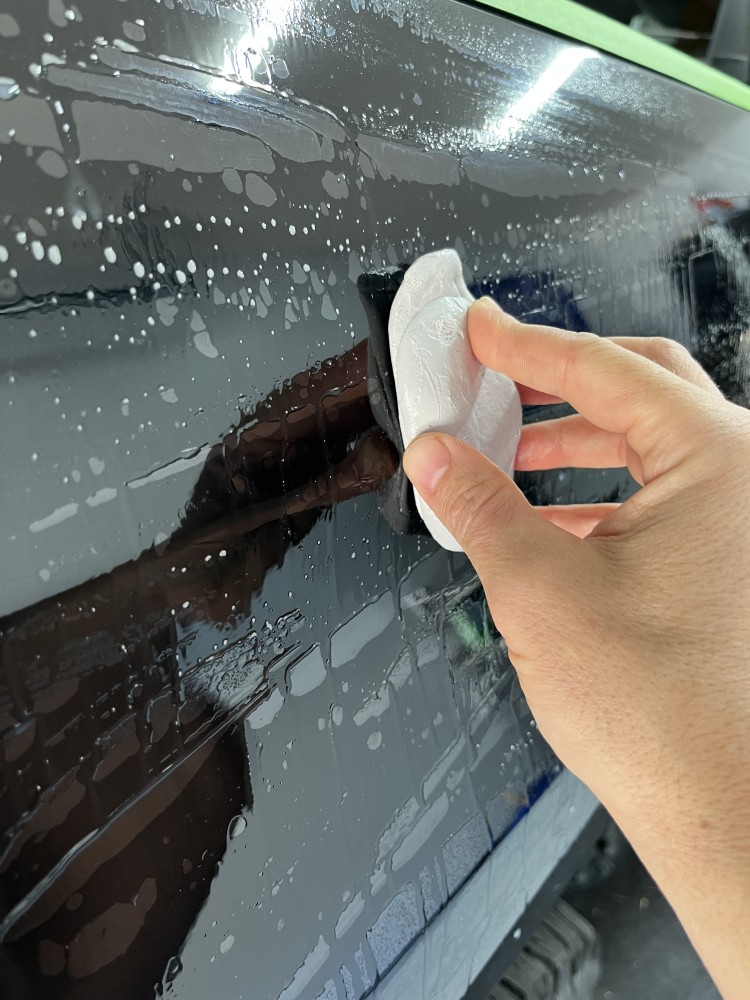
An optional additional step is to use a liquid iron removing prep cleaner – but in my opinion, not a replacement for using a clay bar. For years, clay alone handled iron contamination effectively. Modern iron removers can help loosen embedded particles, but they are not a replacement for proper mechanical decontamination.
Whichever method you choose, don't skip this step, because iron particulates left in the paint can, over the long term, cause damage to the clear coat, and you don't want to go over it with a protective coating.
Now that we have removed the metal particulates, we want to polish the paint. Polishing refines the surface primarily through mechanical abrasion, and depending on the product used, may also include chemical cleaners that remove oxidation and residue. Through the polishing process, you will remove paint imperfections like oxidation, swirl marks, and fine scratches, leaving a clean, uniform surface that allows for proper adhesion of whatever type of protectant you apply over it– be it wax, sealant, SiO2, or ceramic coating.
You must go in this order when prepping your car. Each step removes a level of contamination, so you don't want to overburden another step with it. For example, you don't want to load your polishing pad with all the dirt that a wash can remove, and polishes aren't designed to remove heavy-metal particulates from brake dust. So stick to the order for the best results.
But before you apply your protective coating, there's just one more important step left.
The Final Wipe
A prep spray removes all remaining oils and contaminants left after polishing. It also removes any fillers that can mask swirl marks that were not removed but masked over.
A prep spray can come ready-made for convenience, or you can make your own 50/50 mixture of isopropyl alcohol (IPA) and distilled water.
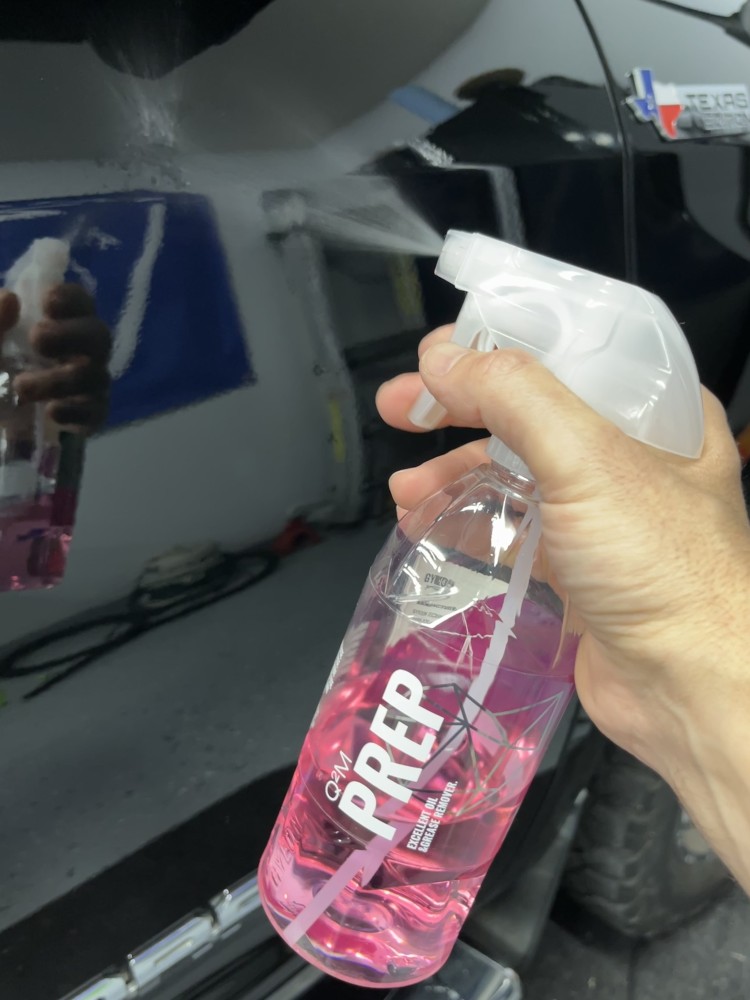
I lean towards a premade prep spray for two reasons. One, I prefer to have something ready to go, and two, prep sprays usually contain a surfactant (a fancy word for cleaning detergent) to help remove oils that IPA may not fully remove. They also tend to flash a little slower and have a more balanced formulation.
The choice is yours. Whichever you choose, again, try not to skip this step. If you're applying a ceramic coating, some kits include a prep spray, also called a precoat.
What You Actually Need
In prepping your car, using the right tools can make all the difference.
Prep is not about buying 15 products. It's about doing the right steps properly. Professionals are all about efficiency and don't usually have all the bells and whistles that enthusiasts tend to indulge in.
So stick with basic tools, but make sure they're quality. You'll need a quality microfiber wash mitt, a light-grade clay bar, microfiber applicators for applying the protective coating, and a microfiber towel with at least 300 GSM to remove waxes, sealants, or coatings, and that won't shed (keep Costco towels out of this process).
Common Prep Failures (What Goes Wrong)
Rushing any one of these steps is the biggest mistake most make. Skipping the clay bar phase seems like no big deal because the change is not visible, but it makes a big difference. When you run your hands over paint that's been properly prepped, you won't believe how smooth it is.
Bottom line: don't skip and don't rush. The goal isn't to add more steps. It's to understand why each step exists.
Closing Thought
There is nothing Instagram-worthy about showing the prep process, but when you see a car that's been treated and prepped with patience, you can tell a lot of time went into the prep.
Don't end up taking shortcuts and getting frustrated when you must redo it. Prep is the unseen effort few admire, but it's that unseen work that separates a decent detail from a professional result.
Frequently Asked Questions
Q: Why is paint prep important before waxing or coating?
Paint prep determines how well any protectant performs. 80% of protection performance relies more on prep than the product you choose. Proper prep ensures maximum adhesion and long-term results by removing contamination, oxidation, oils, and old product residue. Bad prep means bad results—you can tell when someone reverses this rule.
Q: What are the steps for proper paint prep?
The steps are: wash with quality car wash shampoo to remove loose contaminants, clay bar to remove bonded contamination including brake dust and iron particles, polish to remove oxidation and swirl marks and create uniform surface, and final wipe with prep spray to remove remaining oils and fillers. Follow this order—each step removes a level of contamination you don't want to burden the next step with.
Q: Do you need to clay bar before waxing?
Yes, clay bar is essential before any protection. It removes bonded contamination including metal particles from brake dust, rail dust, and road pollution. Skipping this step seems like no big deal because the change isn't visible, but iron particulates left in paint can cause long-term clear coat damage. When you run your hands over properly prepped paint, you won't believe how smooth it is.
Q: What is a prep spray and do you need it?
Prep spray removes all remaining oils and contaminants left after polishing, plus any fillers that can mask swirl marks. You can use a ready-made prep spray (preferred for convenience and better formulation with surfactants) or make a 50/50 mixture of isopropyl alcohol and distilled water. Don't skip this final step—it ensures proper adhesion for ceramic coatings, sealants, or wax.
Q: Can you skip polishing before ceramic coating?
No, polishing is essential before any protection. It refines the surface through mechanical abrasion, removes oxidation and residue, eliminates paint imperfections like swirl marks and fine scratches, and creates a clean uniform surface that allows proper adhesion. Polishes aren't designed to remove heavy brake dust contamination, which is why clay bar comes first in the prep sequence.
Q: What tools do you need for paint prep?
You need: quality microfiber wash mitt, light-grade clay bar, microfiber applicators for applying protection, and microfiber towel with at least 300 GSM that won't shed (keep Costco towels out of this process). Prep isn't about buying 15 products—it's about doing the right steps properly with quality basic tools. Professionals focus on efficiency, not bells and whistles.
Q: Why does paint prep order matter?
Each prep step removes a specific level of contamination, so you must follow the order: wash, clay bar, polish, prep spray. You don't want to load your polishing pad with dirt that washing can remove, and polishes aren't designed to remove heavy metal particulates from brake dust. Following the correct sequence ensures each step can focus on what it does best for optimal results.
Q: Are iron removers better than clay bar?
No, iron removers are not a replacement for clay bar. For years, clay alone handled iron contamination effectively. Modern liquid iron removers can help loosen embedded particles, but they're an optional additional step, not a replacement for proper mechanical decontamination. Clay bar physically removes bonded contamination that chemical cleaners cannot fully eliminate.
Q: What are the biggest paint prep mistakes?
The biggest mistake is rushing any step. Skipping clay bar seems like no big deal because the change isn't visible, but it makes a huge difference in adhesion and longevity. Don't skip steps and don't rush—the goal isn't to add more steps, it's to understand why each step exists. Shortcuts lead to frustration when you must redo the work.
Q: How long does proper paint prep take?
Proper paint prep typically takes 80% of total project time—most people underestimate this, expecting prep to be 20% and application to be 80%. The reality is reversed. Prep is the unseen effort few admire, but it's that unseen work that separates a decent detail from a professional result. Nothing Instagram-worthy about prep, but when done right, you can tell a lot of time went into it.